Lumagen Radiance Pro

MSRP: $300.00
Daily Drivers LLC
30 days
Platform:
Version: 1007
LUMAGEN-UI
Please sign in to buy

This product cannot be added to the
cart because you are not logged in.


The Lumagen driver is a full two way Serial driver with feedback from the Lumagen. It provides switching of inputs for all radiance pro models including the new 5348. After initial programming it's expected that the customer would not need the IR remote further and rely upon automations configured in Control 4.
 
The preferred setup for Lumagen is to have all sources connected directly to the lumagen and then connect the lumagen to the projector and preamp/processor/reciever. This creates an issue that you don't get any volume or mute feedback on your screen because the preamp/receiver is out of path. The driver resolves this by providing access to a text overlay in the Radiance. By enabling "Auto Volume" and "Auto Mute" the control 4 driver will hook the volume level and mute state from the room the lumagen is located in and use them to trigger a message on the display. No programming required. If that doesn't work in the customer's configuration, there is a mute on/off command available in programming and a message can be written to the display to indicate the volume or mute state via variables. Arbitrary messages can be written to the display to signal doorbell rings or other events. Other variables (I.E. Surround mode etc) can also be written to the display. 
 
The driver allows modificaiton of the colors and transparency used in the overlay to match the customer's decor and taste.
 
Supports IR power on, this is only needed in some rare condition.
 
All remote commands can be fired from programming and almost all of the lumagen video attributes are exposed as variables. This allows you to alter Lumagen configuration based on something in your environment such as moving an anamorphic lens in and out or selecting a video game source that needs certain latency (game mode) or video configuration. You can also automate any aspect ratio, zoom etc changes. The state of video being displayed by the lumagen can also be used to trigger outside events. Every time the video changes aspect ratio, resolution, refresh rate, color space etc, the variables are updated and via standard C4 programming any type of automation can be triggered. Some customers that change color space settings on their Sony projector based on the input color space. When using the Lumagen for DTM they are putting the Sony in the proper HDR color space. This also allows for HDR to SDR mapping or HDR without triggering high lamp mode by not passing the HDR flag to the display but setting a HDR color space.  The aspect ratio variable can be used to trigger automatic masking systems and anamorphic lenses. Care must be taken that sources that change aspect ratio frequently do not cause mechanical malfunctions. 
 
 
Commands
 
The following commands are supported via programming.
 
Mute On - Display Mute
Mute Off - Clear display of Mute
Select Input 1-10
Select Input Aspect Ratio NLS, 4:3, 4:3NZ, LBOX, LBOXNZ, 16:9, 16:9NZ, 1.85, 1.85NZ, 2.35, 2.35NZ
Select Output Aspect Ratio O16:9, O2.35, O1.33
Select Memory MEMA, MEMB, MEMC, MEMD
Select Resolution 480P, 540P, 600P, 720P, 768P, 840P, 1080P, 1080I
Darbee - Enable/Disable, Mode, and adjust value up and down in increments of 1,5, and 10
Sharpening - Enable/Disable, Sensitivity, and adjust value 0-8
Send Generic Command - Commands not covered by above features
 
VARIABLES
 
All feedback is handled through the device variables. 
 
Note: These variables are all read-only, and changing the variables' values does not cause the Lumagen to change state. 
 
 
INPUT_PHYSICALSelected Physical input 1-8
INPUT_LOGICAL - Selected Logical input 1-8
INPUT_CONFIG_NUMBER- Selected Input configuration
INPUT_ASPECT- Input aspect ratio I.E. 178 is 1.78:1 or 16:9
INPUT_RATE - I.E. 23 = 23.9 FPS, 24 = 24FPS, 60 = 60FPS
INPUT_RESOLUTION - I.E. 1080 for 1080P HD, 2160 for 4K
INPUT_MODE - P/I/n Progressive, interlaced, or no input
INPUT_3D_MODE - 2D / Frame-Seq / Frame-Packed / Top-Bottom / Side-by-Side
INPUT_DYNAMIC_RANGE -  SDR/HDR
HDR_MIN - Minimum Luminance of HDR signal
HDR_MAX - Maximum Luminance of HDR signal
HDR_CLL - Maximum Coherent Light Level of HDR signal
INPUT_STATUS - No Source/Active Video/Internal Pattern
NLS - Normal or NLS for Non Linear Stretch enabled
MEM - A / B / C / D
OUTPUT_3D_MODE - 2D / Frame-Seq / Frame-Packed / Top-Bottom / Side-by-Side
OUTPUT_MODE - P/I Progressive or interlaced
OUTPUT_CMS_NUMBER - 0-7
OUTPUT_STYLE_NUMBER - Selected output style 0-8
OUTPUT_COLOR_SPACE - REC601 / REC709 / REC2020 
OUTPUT_RATE - I.E. 23 = 23.9 FPS, 24 = 24FPS, 60 = 60FPS
OUTPUT_RESOLUTION - I.E. 1080 for 1080P HD, 2160 for 4K
OUTPUT_ASPECT - Input aspect ratio I.E. 178 is 1.78:1 or 16:9
OUTPUT_ADJUSTED_ASPECT - Aspect ratio from AR detection I.E. 178 is 1.78:1 or 16:9, Can be overriden by user forcing aspect ratio with sticky.
 
 
These variables are writable. The specified action will occur immediately after updating the variable. The message feature could be used for several things. For example, if the customer has a soundproofed theater you may want to write a message when their doorbell rings or security alarm goes off. You can safely write to the variables at any time, if the lumagen is in an off state the commands are silently discarded (so you can use lazy programming and fire the dorbell message without regard for if the theater is in use for example).
 
 
VOLUME_DISPLAY integer will be immediately displayed as volume
QUICK_MESSAGE string will be immediately displayed as a 1 line message
DARBEE_ENHANCE integer value of 0 - 120 for darbee enhancement
MESSAGE1 string will be stored for displayed as line 1 of a 2 line message
MESSAGE2 string will be displayed as line 2 of a message. Writing to this will trigger display of line 1 and line 2

No posts found

Write a review


Detailed documentation and programming examples are found on the drivers tab including programming examples.
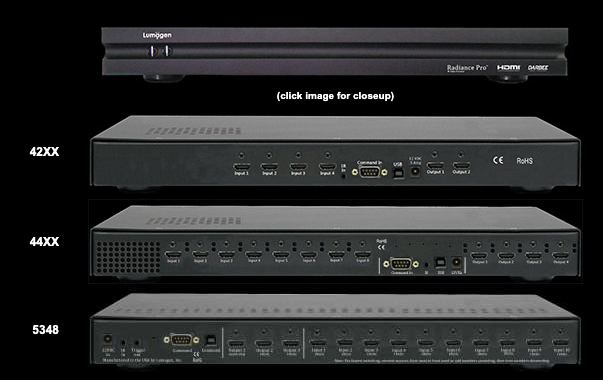

SETUP

The perfered setup for Lumagen is to have all sources connected directly to the lumagen and then connect the lumagen to your preamp/processor/reciever. There are represenations of the discrete outputs, however you may run into audio pathing issues. You can represent this configuration with the driver by connecting the output of the driver to the input on your preamp that the audio output on the lumagen is connected to, then in C4 connect the display to the output of the preamp. Despite having multiple outputs, the lumagen sends the same source to all outputs.

Minimum recommended firmware is 030220. The driver will function with older versions but there will be slower updates and you will not be able to set the color and transparency of system messages. There are significant improvements in later firmware versions in DTM and Sharpening as well as source compatilbility so it is advised to upgrade to current software.

Use a female to female null modem cable or adapter to connect the C4 controller to the Lumagen. Other C4 supported serial devices (I.E. IP to serial devices) should work, however all testing was done via direct connection. If using a 3.5mm serial such as the port on an EA-1 or 3-5 on an EA-5, a DB9 female to female adapter and the "Enable Null-Modem" setting on the EA may be used.

After binding the serial port to the driver and binding the inputs/outputs you must enable notifications on the lumagen. From the Lumagen menu, go to Other > I/O Setup > RS-232 Setup and make sure that Echo is on, Delimiters are off, and that Report Changes is set to Full V3. These serial settings do not conflict with the Lumagen software updater or any of their other tools.

Troubleshooting

If communications issues are encountered with the lumagen, make sure the serial cable is properly connected and it is a null modem. Make sure the connection is made in composer from the correct serial port on the EA to the lumagen. A serial echo test has been added to the properties screen. This will validate your serial connection by sending a query to the lumagen and validating the response.

Setting "Start Serial" begins a test to the lumagen. Sent and Received should increment at the same time. Reset clears counters. To prevent the test from being left running, it will stop after 1000 attempts. If the test stops running (Sent is not incrementing) simply stop the test and restart it. If the "Serial Diags" shows "Serial Not Bound" then a binding from the driver's serial port to the EA hasn't been made. Connect the binding and run the test again.


The lumagen can be either powered on or off and the test will work properly. This test will not work with a loopback or any other product. If Received does not increment when performing the test there is a problem with the serial connection to the lumagen.


Version 1000

  • Initial Drivercentral Release


Version 1002

  • Added Info V4 processing
    • Added new INPUT_DETECTED_ASPECT
    • Added new OUTPUT_DETECTED_ASPECT
  • Added following commands via programming
    • Sharpening Enable/Disable, Level, and Sensitvity.
    • Zoom Number of zoom steps.
    • Shrink Pixels from Top, Bottom, Left, Right.
    • Hotplug Send HDMI Hotplug to one or all interfaces.


Version 1004

  • Fixed issue with IR power on not working
  • Fixed issue with Action menu IR/Serial power on tests not working
  • Fixed cosmetic error with audio/video inputs/outputs when double clicking on driver icon

Version 1005/1006

  • Added Action menu commands to test power on/off
  • Added additional commands to power on sequence to deal with noise on serial lines


Version 1007

  • Added serial diagnostic ping test
  • Added additional new aspect ratios to input aspect ratio command